Boost Your Broadcasts: Unleash the Power of a Dedicated Streaming Server
– where vision meets flawless execution!
Best Practise for Encoding your Videos Before you Upload
Transcoding your video files before uploading them is highly advised to create a uniform transition between video files. Using the wrong codec might create major problems with the player, such as the warning, “The media playback was stopped owing to a corruption problem or because the media employed features your browser does not support.
Most users care about ensuring that encoded videos are limited to a maximum bitrate, If you encode your videos at a higher bitrate than what you allowed on your package your video stream will be unstable. Make sure your bitrate is a little under what you paid for, for example on the RTMP35, your bitrate is 700kbps, which means your video files should be encoded at about 680kbps. More than that your stream will not be stable.
We recommend you encode all files using the HandBrake.fr video transcoder before uploading them.
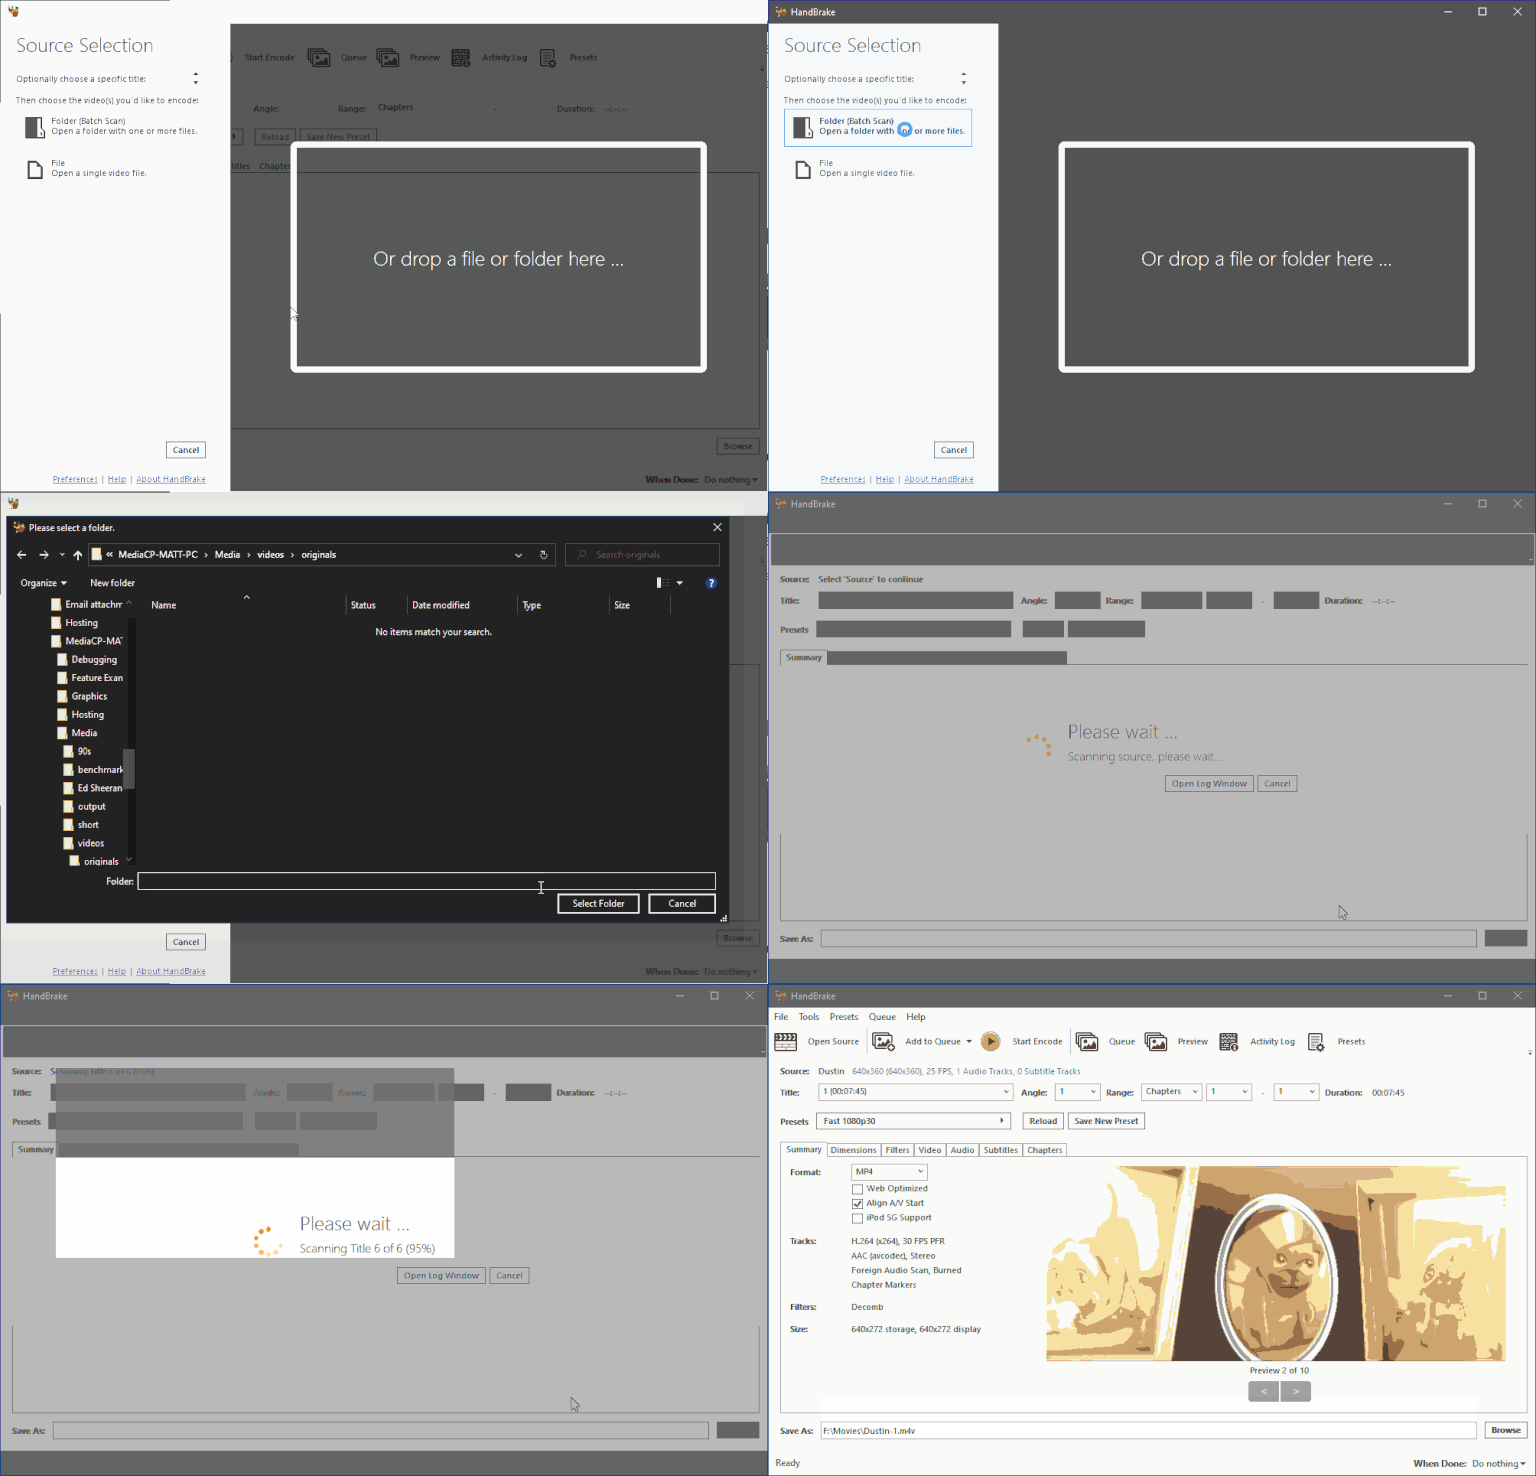
Step 1: Choose your media files.
Launch HandBrake and navigate to your media files.
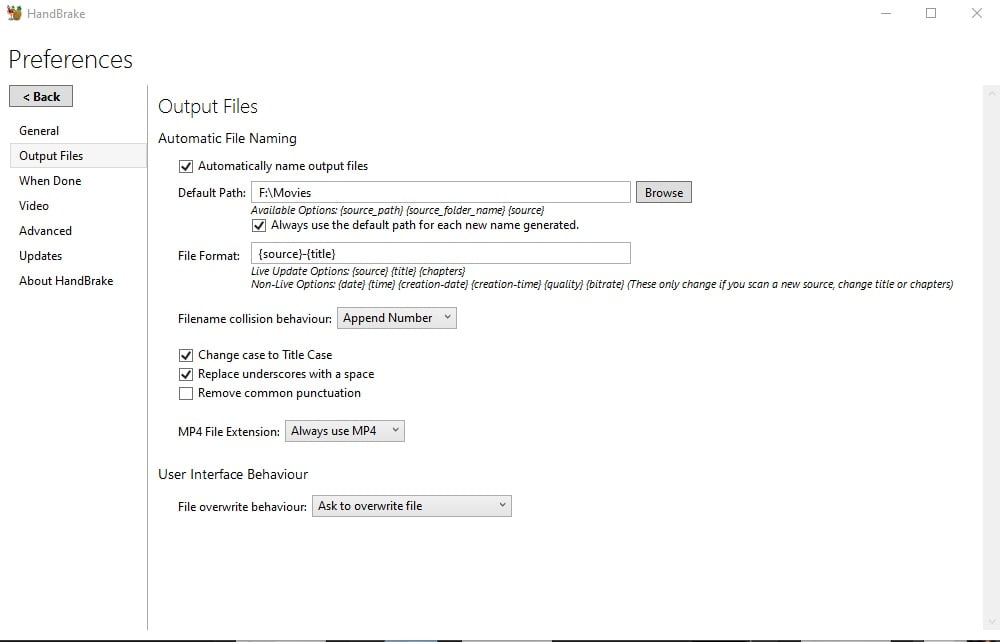
Step 2 – Configure the Default Path and.mp4 file extension
Go to Tools -> Preferences and enter:
Use the MP4 file extension at all times.
Set your Default output route as well.
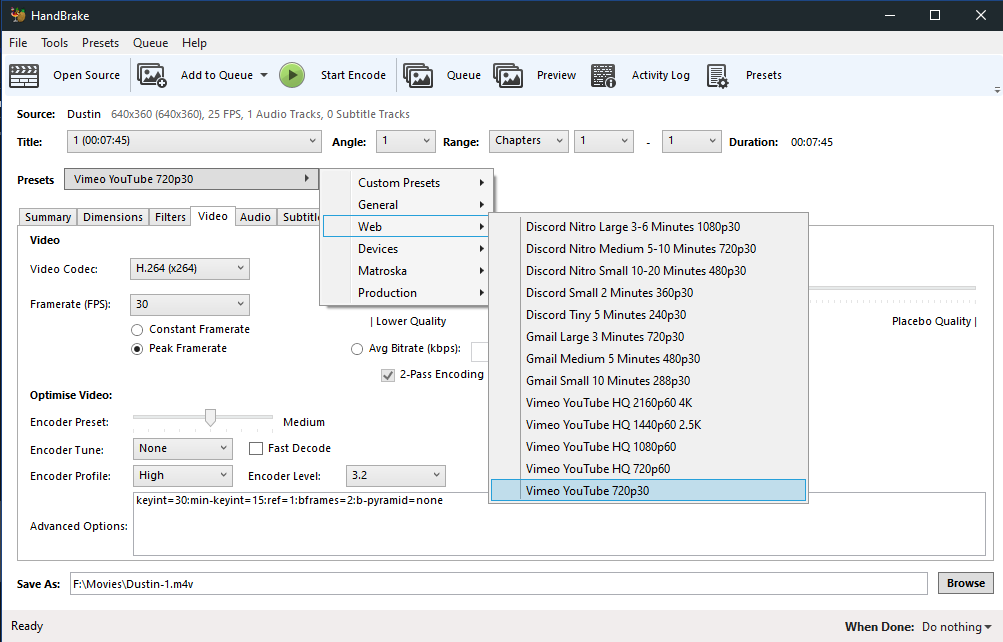
Step 3: Choose a Preset
We recommend using either:
Vimeo Youtube 720p
Video Youtube HQ 1080p
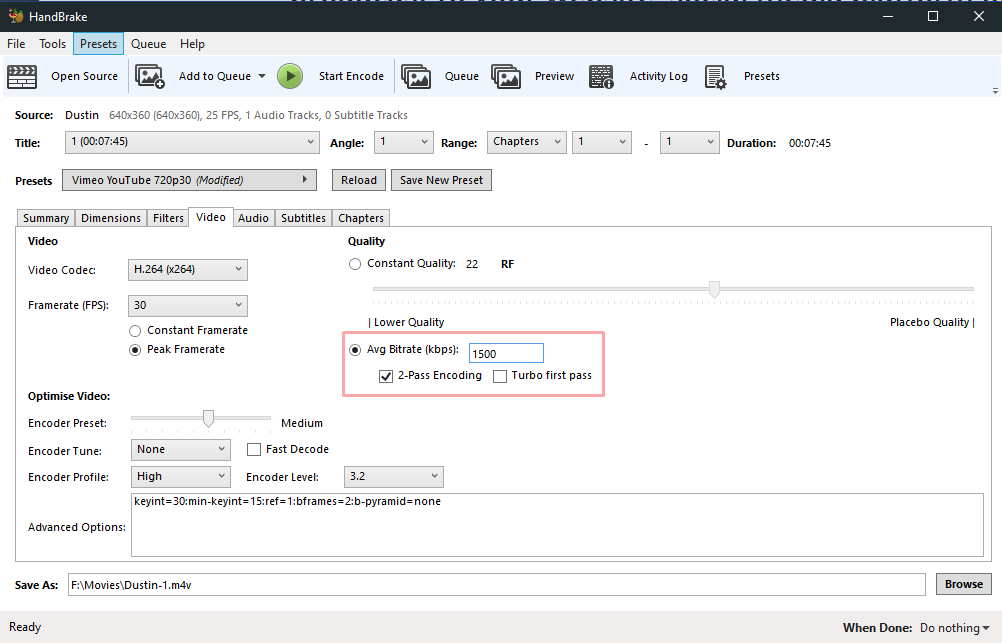
Step 4: Determine the Average Bitrate
Setting a bitrate ensures that your TV Station does not exceed the bitrate restriction.
It is usual for the encoding bitrate to vary by 10%; therefore, keep the Avg Bitrate lower than your maximum.
Step 5 – Configure Output
Select Browse and then enter the location where you want your transcoded files saved.

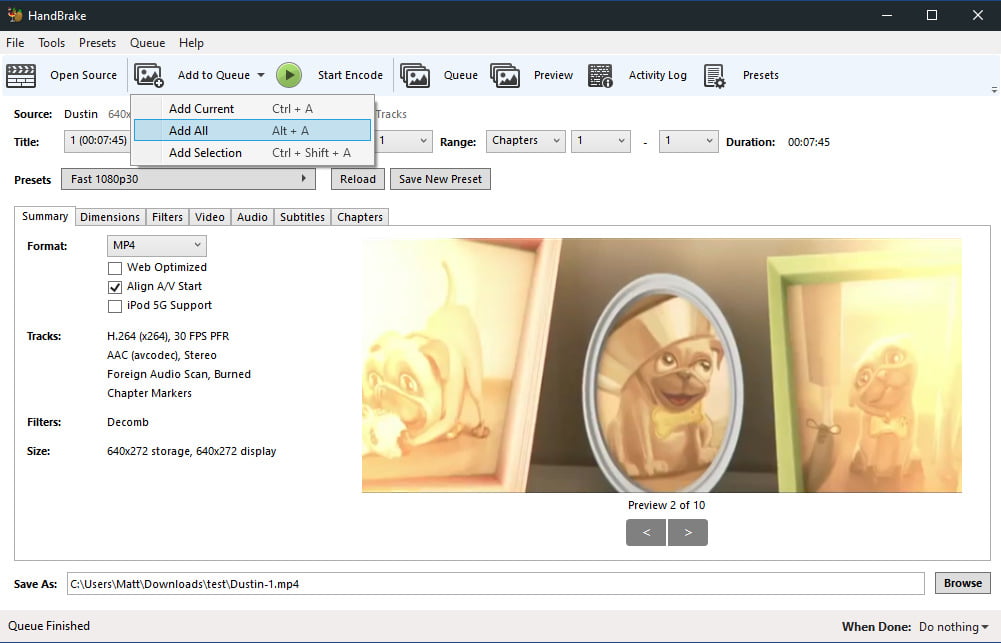
Step 6 – Queue and Encode
Choose to Add to Queue -> Include All Press Begin Encoding
You can now upload your media files.
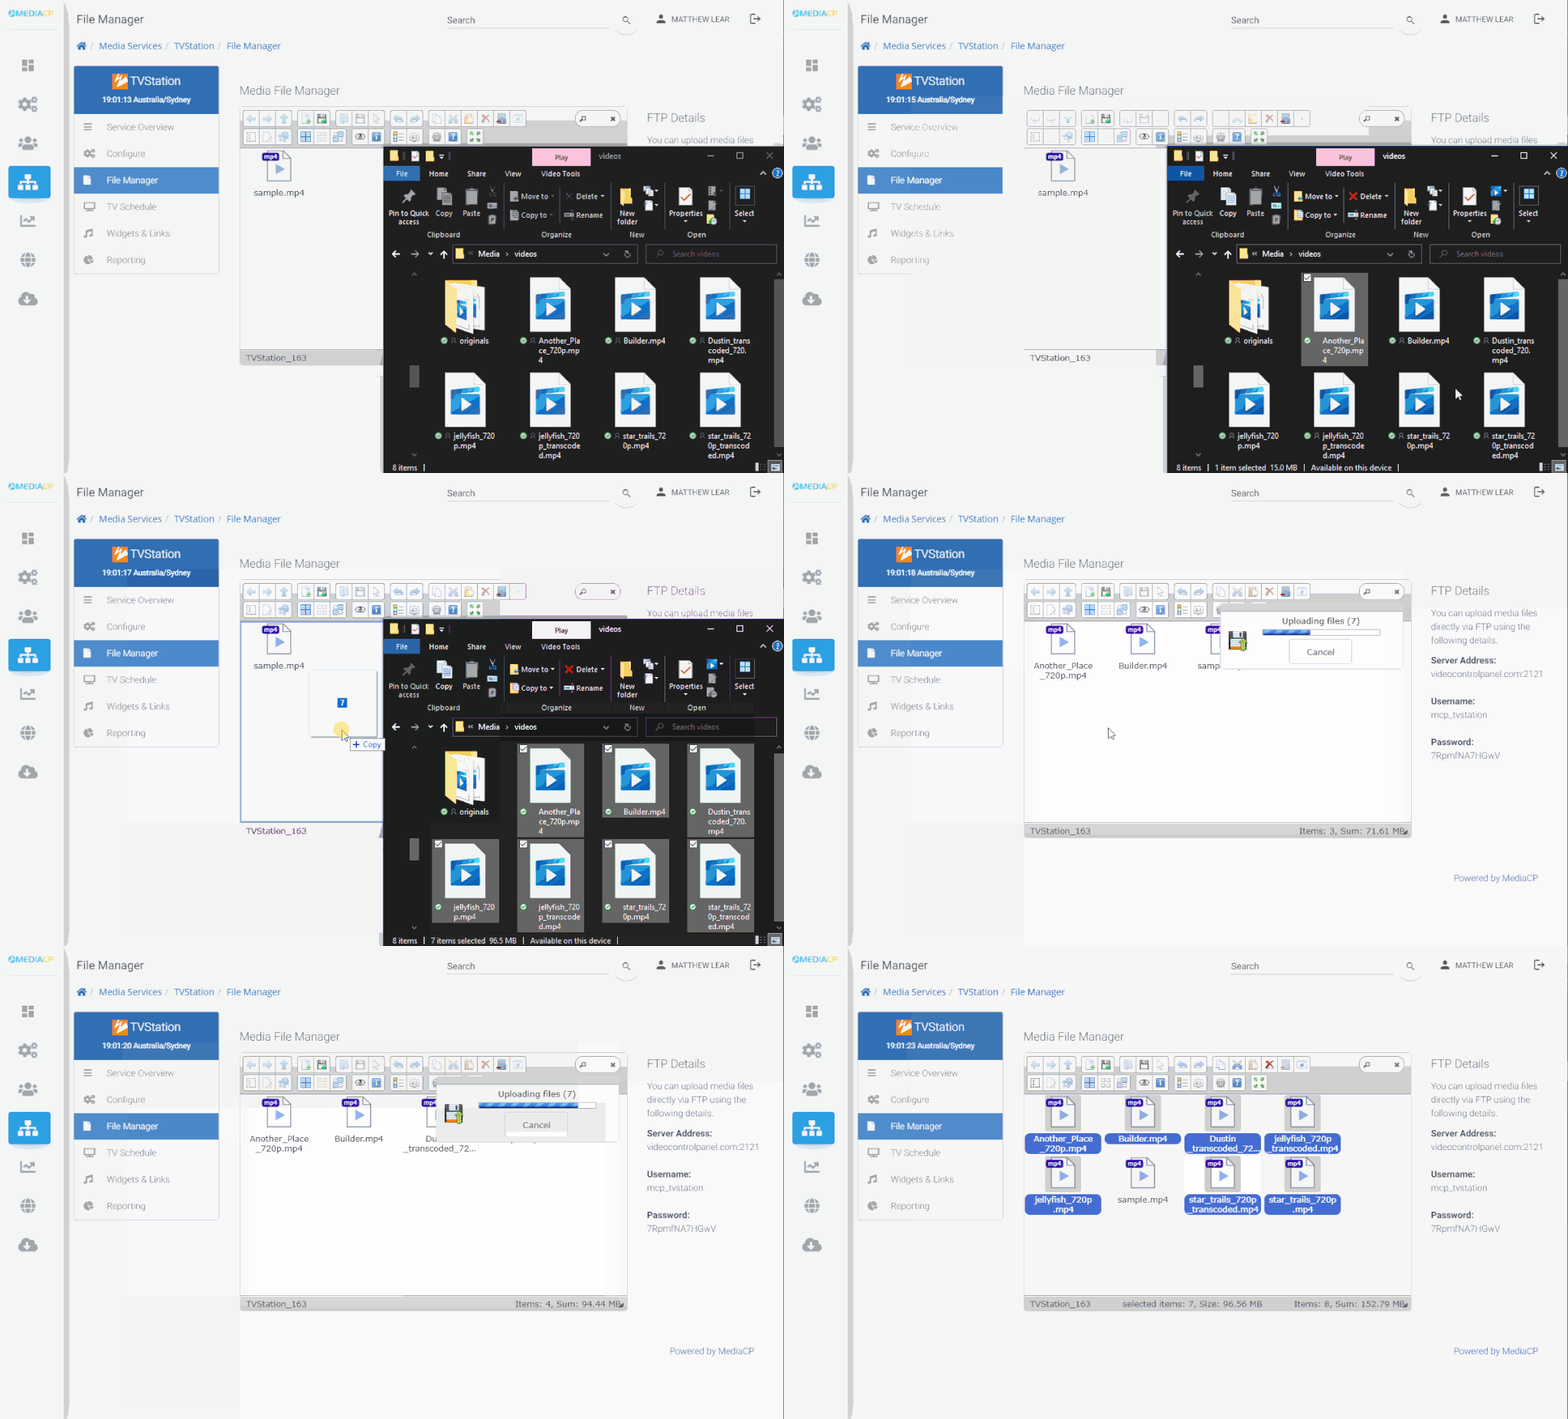
Once they have finished encoding, you can upload your video files to the File Manager.
Go to the File Manager.
Drag and drag your PC’s media files into the Media File Manager.
Let us know if you need help with your settings, open a ticket here.
